Posts

3D Object Project

Image
 For this project Araya and I worked together to make an interesting 3D model design. I've never 3D printed something, so it was very exciting to see and experience the entire process of this project Here were my 6 models that I made  (Design we chose for the final) (Araya's models) (Design we chose for the final model) Here were some sketches of some of the combinations we tried out. We eventually settled on the last one of the little creature guy which I personally think is definitely the coolest one. It was worth trying out so many different combos to get a good final design. First combination! We decided to use my weird bulb shape model and Araya's twizzler looking spiral model to create something that resembles a little jellyfish/creature guy. We also had to adjust each of our models a little to make it fit better into the concept. To make it more creature like, we added the two eyes onto my base. I think this design is really interesting because we managed to somehow

Milestone Project

Image
3D model   Objectified Response Mesh Mashup Papercraft

Papercraft Objects

Image
Over these 2 weeks, I created the final version of my wii remote papercraft For the final version of my wii remote, I first started by figuring out what changes I needed to make to the prototype to get a better end result. I stumbled upon this photo of these cool stylized wii remotes and decided that I was going to use the Princess Peach themed one as inspiration for the colour of my own.  I also decided to split the wii remote into two parts. This was mainly for two reasons; A) the Peach remote was separated into two different shades of pink and B) the wii remote actually has a noticeable line of separation between the top and bottom half. It also just made it easier to construct to be honest. I decided to cut out the cross and "A" button from the top base and connect them from the inside as suggested in the critic session. I reduced the smaller buttons purely to flat pieces rather than trying to fold them.  I started with the bottom base. Because I sorta like the process of

Paper Prototype (official)

Image
 This week we were tasked with making a prototype of our paper project to practice getting the form and details of our form right. For this, I am designing a Wii remote (as I'm sure is evident by my other posts lolol) I started off by taking the base model I designed last week and added the buttons that I was planning to add. Then I proceeded to unroll everything and prepared it for printing.  Unfolded buttons  *Some of the buttons in this page specifically are way too big. I did resize them but theyre still a little big on the prototype. I will fix this for the official model, however I struggled a lot to fold the smaller buttons so they may have to remain oversized in order to keep their form. Constructing the base! Went fairly well, except for the top sides. I realized I screwed up the way it should fold together a little so again I will fix that later on. I used the blunt backside of some tweezers to score the paper and it worked super well.  Final Model! As you can see, the bu

Paper Prototype (PRACTICE)

Image
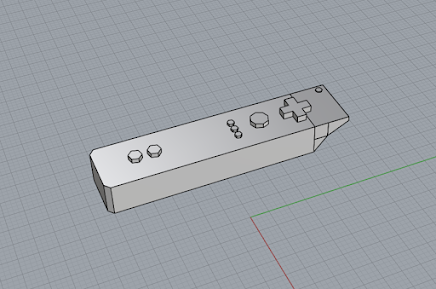
I'm not entirely sure if we had to blog this but I've done it now and I think it's a fun record of my progress ٩(˘◡˘)۶   For my paper replica, I chose the main base of the wii remote to model. I thought this was the most important component to experiment with since it is most of the design. For the first step, modeling the remote, I actually didn't have as much trouble as last time. This version is definitely better then the last one and unfolded into a more functional form that can be easily refolded. Unfolding also went smoothly. For some reason last time I was stuck in the idea that the unfolded version had to be one connected piece, which definitely screwed me up for a few designs. Here the triangle ends meshed with the small triangle folds below it so I separated them. It's not shown in this photo, but I realized that the small corner rectangles (on the right of design) had to come off too, so they are also separated as shown in later photos. The unfolded desig